
Scroll for prep

Please wait…
This video is having trouble loading. You may have lost your Internet connection.
Step 1: Click to Reload this page
Step 2: Click to
Try our other video player
Step 3: contact support if trouble persists.
Or,
dismiss this message.
CONVERSEMOS:
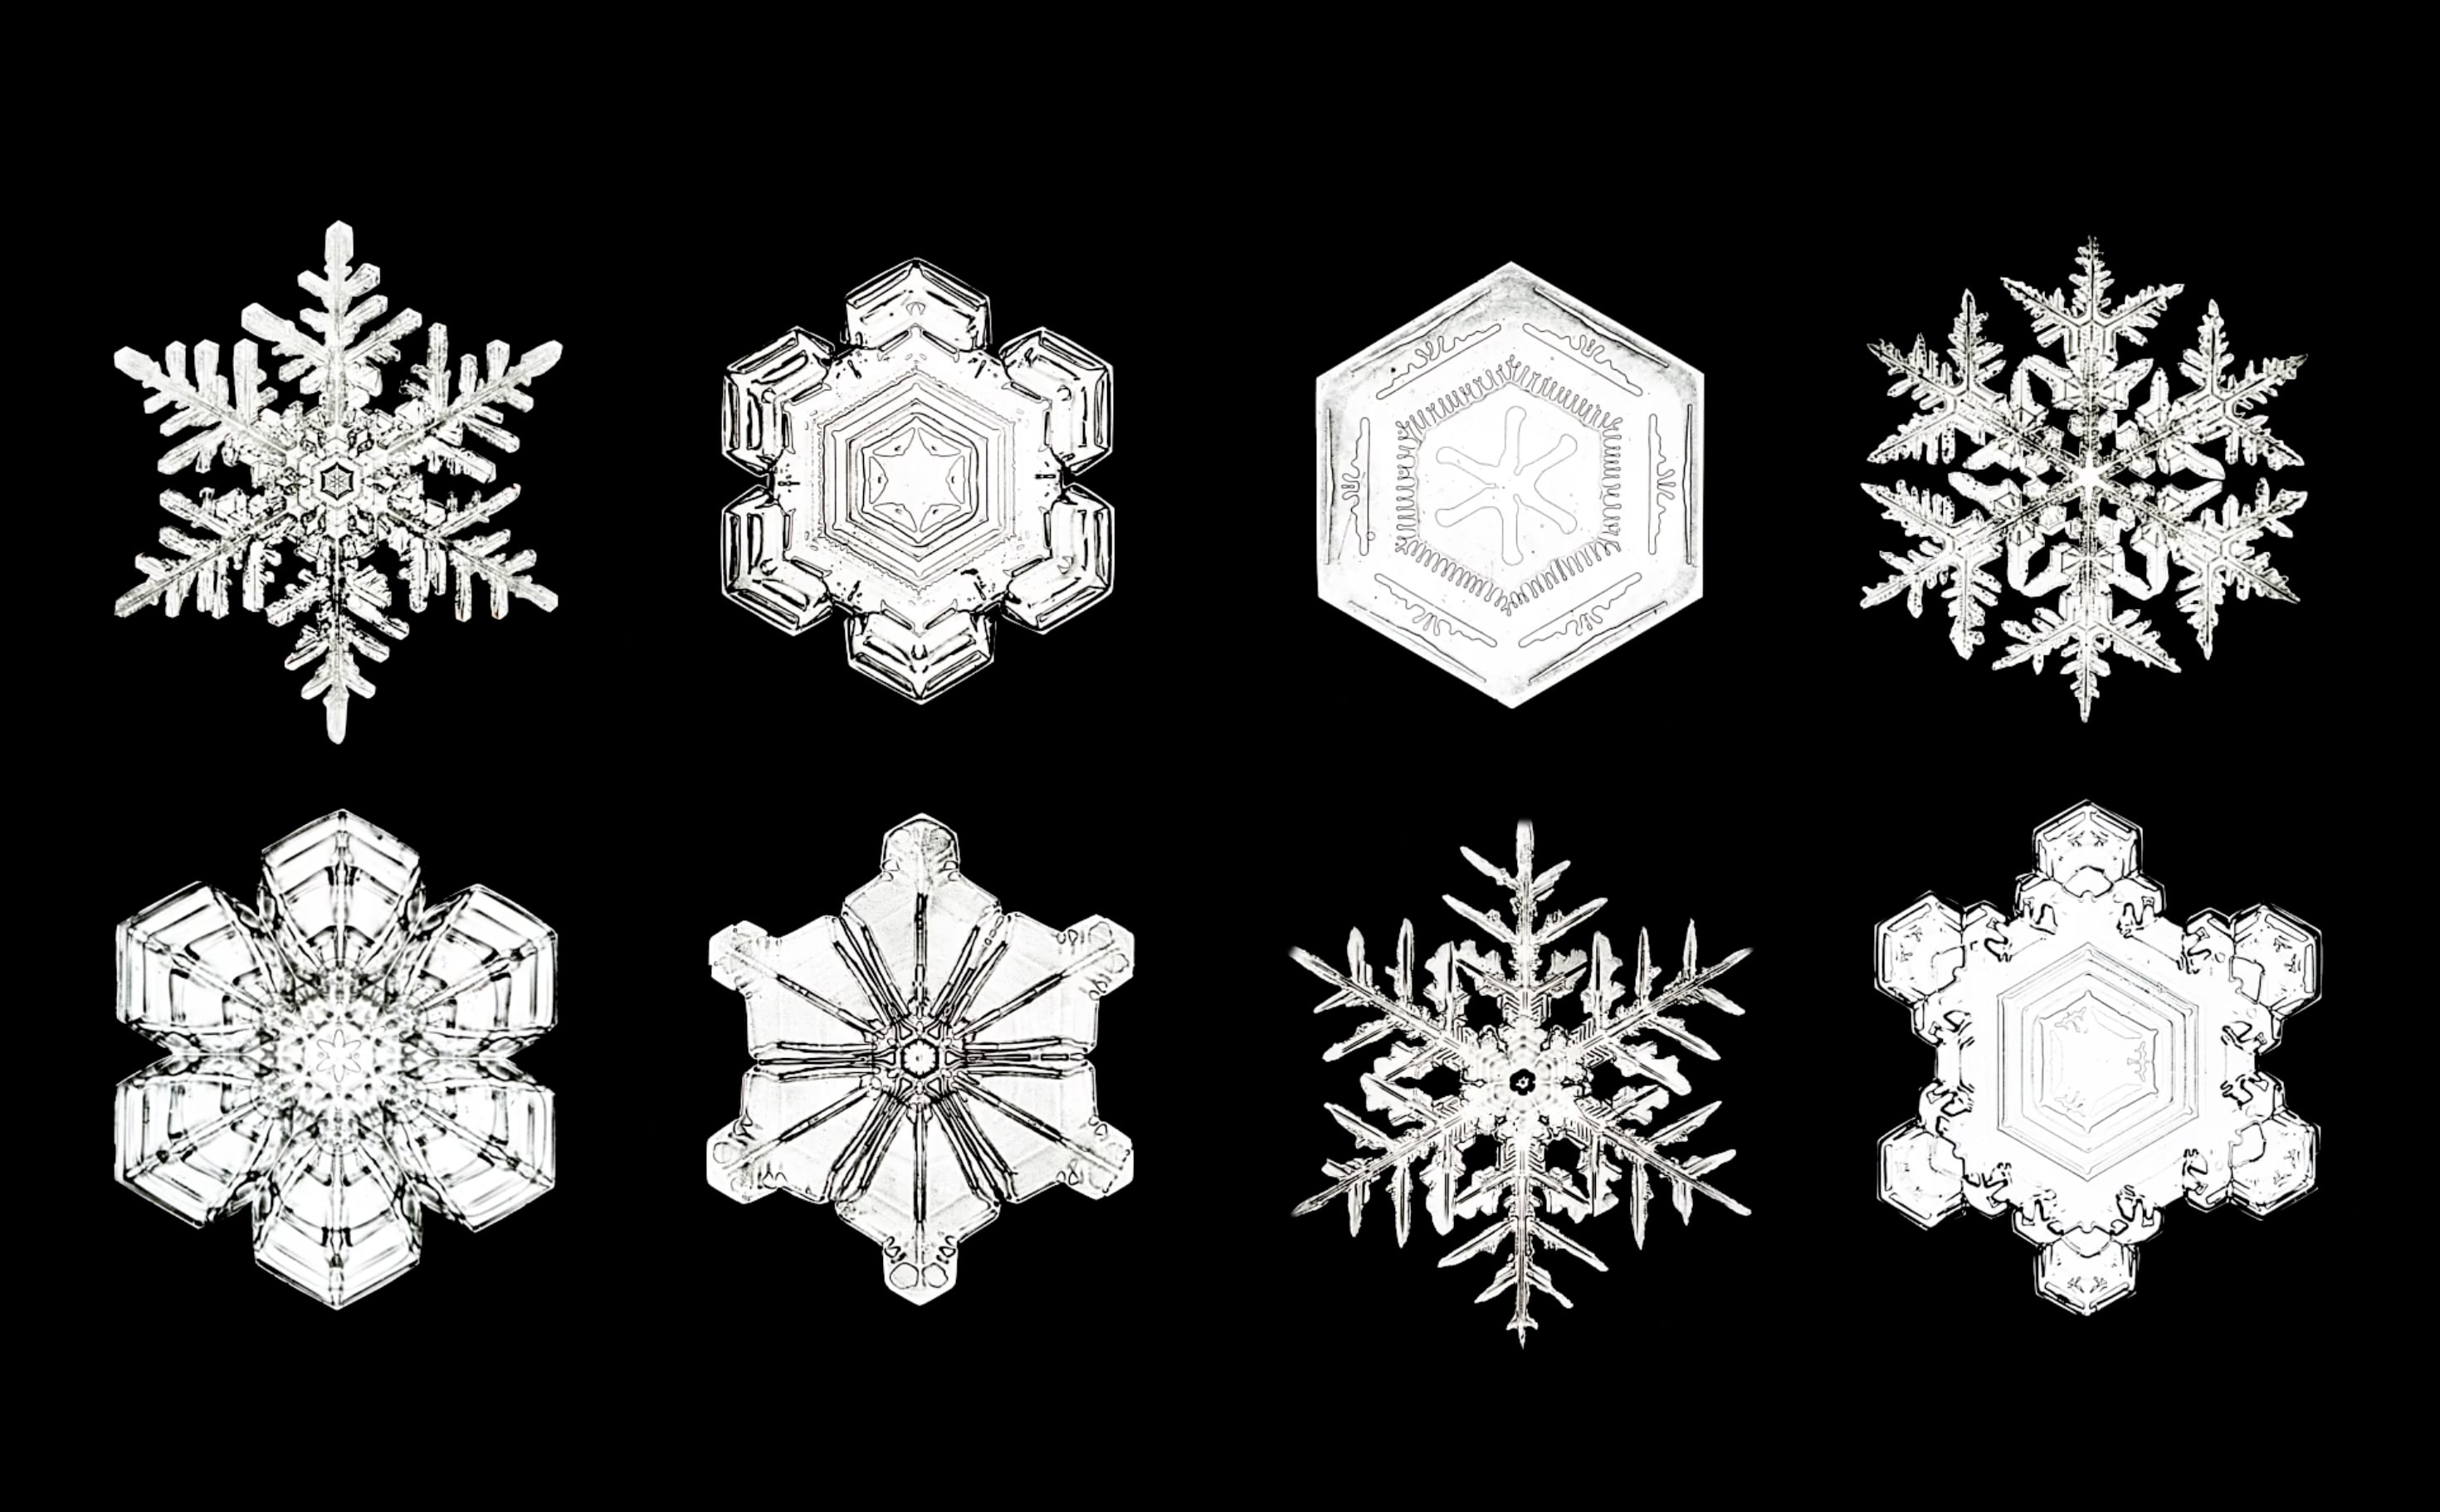
¿Tienen algo en común estos copos de nieve? ¿En qué se parecen?
¿Tienen algo en común estos copos de nieve? ¿En qué se parecen?
Please wait…
This video is having trouble loading. You may have lost your Internet connection.
Step 1: Click to Reload this page
Step 2: Click to
Try our other video player
Step 3: contact support if trouble persists.
Or,
dismiss this message.
Please wait…
This video is having trouble loading. You may have lost your Internet connection.
Step 1: Click to Reload this page
Step 2: Click to
Try our other video player
Step 3: contact support if trouble persists.
Or,
dismiss this message.
Please wait…
This video is having trouble loading. You may have lost your Internet connection.
Step 1: Click to Reload this page
Step 2: Click to
Try our other video player
Step 3: contact support if trouble persists.
Or,
dismiss this message.
Paso
01/19
01/19
Vas a trabajar con un compañero o compañera.
Please wait…
This video is having trouble loading. You may have lost your Internet connection.
Step 1: Click to Reload this page
Step 2: Click to
Try our other video player
Step 3: contact support if trouble persists.
Or,
dismiss this message.
Paso
02/19
02/19
Obtén estos materiales.
Please wait…
This video is having trouble loading. You may have lost your Internet connection.
Step 1: Click to Reload this page
Step 2: Click to
Try our other video player
Step 3: contact support if trouble persists.
Or,
dismiss this message.
Paso
03/19
03/19
Voltea tu filtro de café así. Luego, usa tus dos manos para
extenderlo y alisarlo.
extenderlo y alisarlo.
Please wait…
This video is having trouble loading. You may have lost your Internet connection.
Step 1: Click to Reload this page
Step 2: Click to
Try our other video player
Step 3: contact support if trouble persists.
Or,
dismiss this message.
Paso
04/19
04/19
Dobla tu filtro a la mitad. Aplánalo para que quede plano.
Please wait…
This video is having trouble loading. You may have lost your Internet connection.
Step 1: Click to Reload this page
Step 2: Click to
Try our other video player
Step 3: contact support if trouble persists.
Or,
dismiss this message.
Paso
05/19
05/19
Voltea tu filtro de café. Así será más fácil hacer los dobleces en
los siguientes pasos.
los siguientes pasos.
Please wait…
This video is having trouble loading. You may have lost your Internet connection.
Step 1: Click to Reload this page
Step 2: Click to
Try our other video player
Step 3: contact support if trouble persists.
Or,
dismiss this message.
Paso
06/19
06/19
Toma la esquina de abajo y júntala con la esquina de arriba.
Deslízala hasta que parezca que tengas dos rebanadas de pizza
del mismo tamaño. Aplánalo para que quede plano.
Deslízala hasta que parezca que tengas dos rebanadas de pizza
del mismo tamaño. Aplánalo para que quede plano.
Please wait…
This video is having trouble loading. You may have lost your Internet connection.
Step 1: Click to Reload this page
Step 2: Click to
Try our other video player
Step 3: contact support if trouble persists.
Or,
dismiss this message.
Paso
07/19
07/19
Toma la esquina de arriba y dóblala para juntarla con la esquina
de abajo. Al final de este paso, tu filtro de café debe de parecer
una sola rebanada de pizza.
de abajo. Al final de este paso, tu filtro de café debe de parecer
una sola rebanada de pizza.
Please wait…
This video is having trouble loading. You may have lost your Internet connection.
Step 1: Click to Reload this page
Step 2: Click to
Try our other video player
Step 3: contact support if trouble persists.
Or,
dismiss this message.
Paso
08/19
08/19
Pon tu dedo sobre la punta del filtro de café. Luego usa tu dedo
como una guía para dibujar una línea recta con un crayón.
como una guía para dibujar una línea recta con un crayón.
Please wait…
This video is having trouble loading. You may have lost your Internet connection.
Step 1: Click to Reload this page
Step 2: Click to
Try our other video player
Step 3: contact support if trouble persists.
Or,
dismiss this message.
Paso
09/19
09/19
Encuentra la parte de tu dedo que puedes flexionar. Alíneala con
la orilla de abajo de tu modelo. Luego, usa tu crayón para dibujar
un punto arriba de tu dedo.
la orilla de abajo de tu modelo. Luego, usa tu crayón para dibujar
un punto arriba de tu dedo.
Please wait…
This video is having trouble loading. You may have lost your Internet connection.
Step 1: Click to Reload this page
Step 2: Click to
Try our other video player
Step 3: contact support if trouble persists.
Or,
dismiss this message.
Paso
10/19
10/19
Escoge qué tipo de triángulo quieres dibujar.
Please wait…
This video is having trouble loading. You may have lost your Internet connection.
Step 1: Click to Reload this page
Step 2: Click to
Try our other video player
Step 3: contact support if trouble persists.
Or,
dismiss this message.
Paso
11/19
11/19
Voltea tu modelo de esta forma. Luego, alinea tu dedo con la orilla
de abajo de tu modelo.
de abajo de tu modelo.
Please wait…
This video is having trouble loading. You may have lost your Internet connection.
Step 1: Click to Reload this page
Step 2: Click to
Try our other video player
Step 3: contact support if trouble persists.
Or,
dismiss this message.
Paso
12/19
12/19
Dibuja el mismo tipo de triángulo en esta orilla también.
Please wait…
This video is having trouble loading. You may have lost your Internet connection.
Step 1: Click to Reload this page
Step 2: Click to
Try our other video player
Step 3: contact support if trouble persists.
Or,
dismiss this message.
Paso
13a/19
13a/19
Voltea tu filtro de café. Pon tu dedo en medio de la orilla de abajo.
Luego, usa un crayón para dibujar un punto arriba de tu dedo.
Luego, usa un crayón para dibujar un punto arriba de tu dedo.
Please wait…
This video is having trouble loading. You may have lost your Internet connection.
Step 1: Click to Reload this page
Step 2: Click to
Try our other video player
Step 3: contact support if trouble persists.
Or,
dismiss this message.
Paso
13b/19
13b/19
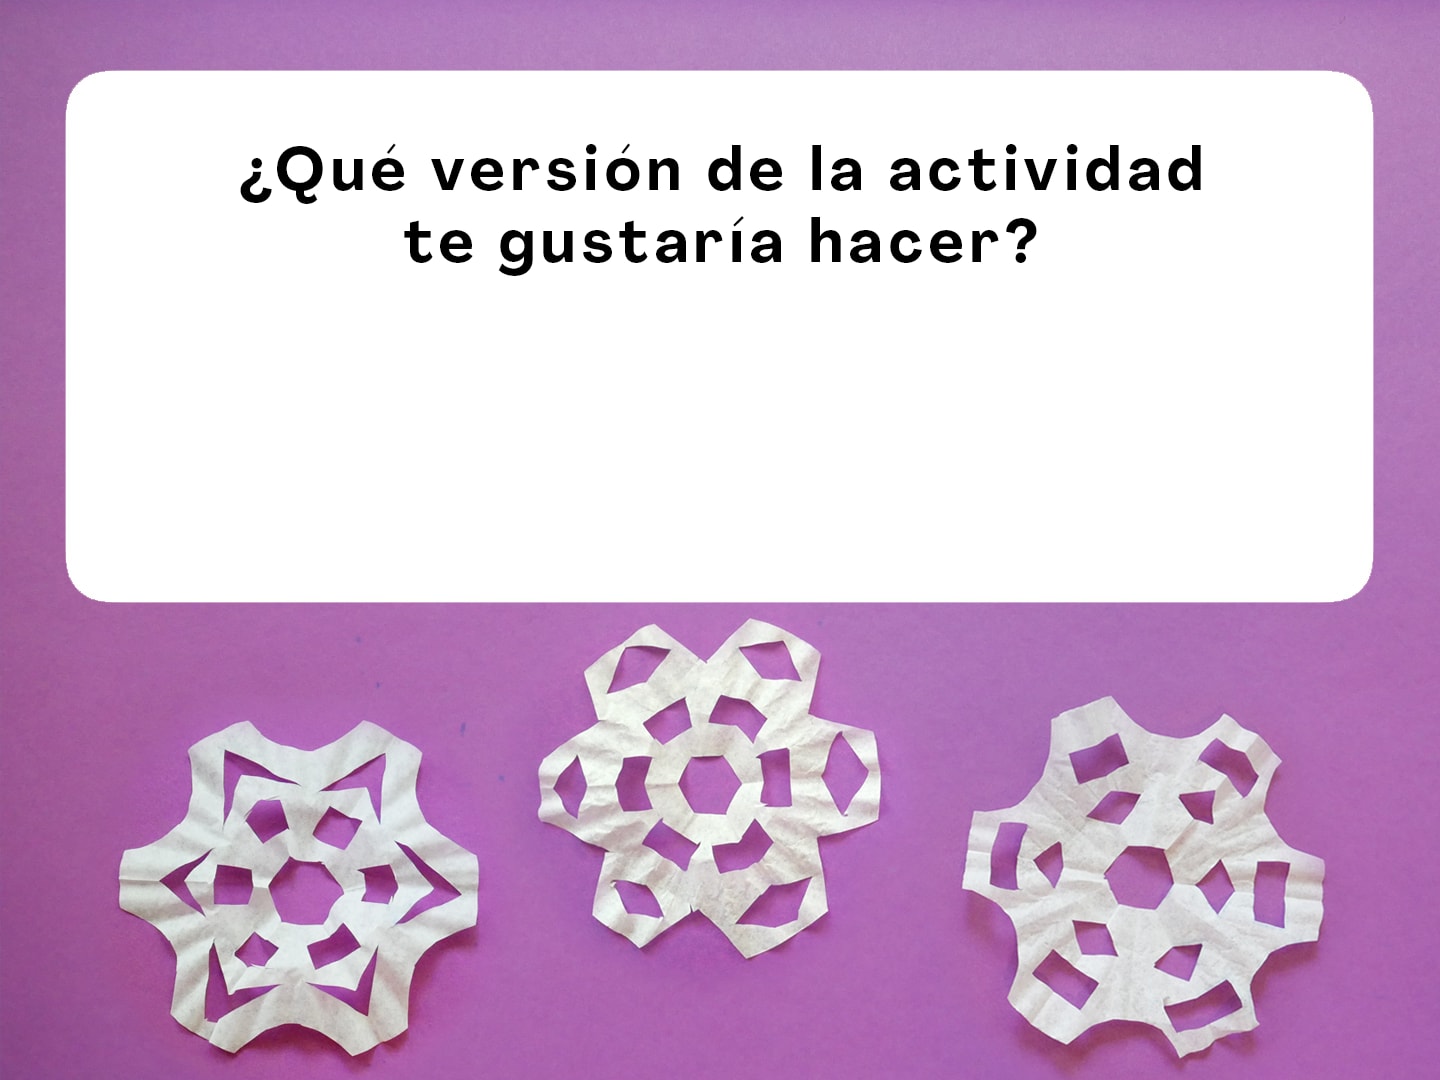
Escoge la forma que te gustaría dibujar.
Please wait…
This video is having trouble loading. You may have lost your Internet connection.
Step 1: Click to Reload this page
Step 2: Click to
Try our other video player
Step 3: contact support if trouble persists.
Or,
dismiss this message.
Paso
14/19
14/19
Corta a lo largo de esta línea primero.
Please wait…
This video is having trouble loading. You may have lost your Internet connection.
Step 1: Click to Reload this page
Step 2: Click to
Try our other video player
Step 3: contact support if trouble persists.
Or,
dismiss this message.
Paso
15/19
15/19
Recorta las formas que están cerca de las orillas, y amontona todos
los pedazos de papel que te sobren.
los pedazos de papel que te sobren.
Please wait…
This video is having trouble loading. You may have lost your Internet connection.
Step 1: Click to Reload this page
Step 2: Click to
Try our other video player
Step 3: contact support if trouble persists.
Or,
dismiss this message.
Paso
16/19
16/19
Conversemos:
Please wait…
This video is having trouble loading. You may have lost your Internet connection.
Step 1: Click to Reload this page
Step 2: Click to
Try our other video player
Step 3: contact support if trouble persists.
Or,
dismiss this message.
Paso
17a/19
17a/19
Conversemos:
Please wait…
This video is having trouble loading. You may have lost your Internet connection.
Step 1: Click to Reload this page
Step 2: Click to
Try our other video player
Step 3: contact support if trouble persists.
Or,
dismiss this message.
Paso
17b/19
17b/19
Esto fue lo que nosotros notamos.
Please wait…
This video is having trouble loading. You may have lost your Internet connection.
Step 1: Click to Reload this page
Step 2: Click to
Try our other video player
Step 3: contact support if trouble persists.
Or,
dismiss this message.
Paso
18a/19
18a/19
Conversemos:
Please wait…
This video is having trouble loading. You may have lost your Internet connection.
Step 1: Click to Reload this page
Step 2: Click to
Try our other video player
Step 3: contact support if trouble persists.
Or,
dismiss this message.
Paso
18b/19
18b/19
Esto es lo que nosotros pensamos.
Please wait…
This video is having trouble loading. You may have lost your Internet connection.
Step 1: Click to Reload this page
Step 2: Click to
Try our other video player
Step 3: contact support if trouble persists.
Or,
dismiss this message.
Paso
19/19
19/19
Si tienes tiempo, puedes crear otros modelos de copos de nieve.
¡Has terminado la actividad!
Please wait…
This video is having trouble loading. You may have lost your Internet connection.
Step 1: Click to Reload this page
Step 2: Click to
Try our other video player
Step 3: contact support if trouble persists.
Or,
dismiss this message.
Please wait…
This video is having trouble loading. You may have lost your Internet connection.
Step 1: Click to Reload this page
Step 2: Click to
Try our other video player
Step 3: contact support if trouble persists.
Or,
dismiss this message.
Paso
01/17
01/17
Vas a trabajar con un compañero o compañera.
Please wait…
This video is having trouble loading. You may have lost your Internet connection.
Step 1: Click to Reload this page
Step 2: Click to
Try our other video player
Step 3: contact support if trouble persists.
Or,
dismiss this message.
Paso
02/17
02/17
Obtén estos materiales.
Please wait…
This video is having trouble loading. You may have lost your Internet connection.
Step 1: Click to Reload this page
Step 2: Click to
Try our other video player
Step 3: contact support if trouble persists.
Or,
dismiss this message.
Paso
03/17
03/17
Voltea tu filtro de café así. Luego, usa tus dos manos para
extenderlo y alisarlo.
extenderlo y alisarlo.
Please wait…
This video is having trouble loading. You may have lost your Internet connection.
Step 1: Click to Reload this page
Step 2: Click to
Try our other video player
Step 3: contact support if trouble persists.
Or,
dismiss this message.
Paso
04/17
04/17
Dobla tu filtro a la mitad. Aplánalo para que quede plano.
Please wait…
This video is having trouble loading. You may have lost your Internet connection.
Step 1: Click to Reload this page
Step 2: Click to
Try our other video player
Step 3: contact support if trouble persists.
Or,
dismiss this message.
Paso
05/17
05/17
Voltea tu filtro de café. Así será más fácil hacer los dobleces
en los siguientes pasos.
en los siguientes pasos.
Please wait…
This video is having trouble loading. You may have lost your Internet connection.
Step 1: Click to Reload this page
Step 2: Click to
Try our other video player
Step 3: contact support if trouble persists.
Or,
dismiss this message.
Paso
06/17
06/17
Toma la esquina de abajo y júntala con la esquina de arriba.
Deslízala hasta que parezca que tengas dos rebanadas de pizza
del mismo tamaño. Aplánalo para que quede plano.
Deslízala hasta que parezca que tengas dos rebanadas de pizza
del mismo tamaño. Aplánalo para que quede plano.
Please wait…
This video is having trouble loading. You may have lost your Internet connection.
Step 1: Click to Reload this page
Step 2: Click to
Try our other video player
Step 3: contact support if trouble persists.
Or,
dismiss this message.
Paso
07/17
07/17
Toma la esquina de arriba y dóblala para juntarla con la esquina
de abajo. Al final de este paso, tu filtro de café debe de parecer
una sola rebanada de pizza.
de abajo. Al final de este paso, tu filtro de café debe de parecer
una sola rebanada de pizza.
Please wait…
This video is having trouble loading. You may have lost your Internet connection.
Step 1: Click to Reload this page
Step 2: Click to
Try our other video player
Step 3: contact support if trouble persists.
Or,
dismiss this message.
Paso
08/17
08/17
Pon tu dedo sobre la punta del filtro de café. Luego usa tu dedo
como una guía para dibujar una línea recta con un crayón.
como una guía para dibujar una línea recta con un crayón.
Please wait…
This video is having trouble loading. You may have lost your Internet connection.
Step 1: Click to Reload this page
Step 2: Click to
Try our other video player
Step 3: contact support if trouble persists.
Or,
dismiss this message.
Paso
09/17
09/17
Antes de empezar a dibujar nuestros diseños para las ramas, aquí
tienes varios consejos:
tienes varios consejos:
Please wait…
This video is having trouble loading. You may have lost your Internet connection.
Step 1: Click to Reload this page
Step 2: Click to
Try our other video player
Step 3: contact support if trouble persists.
Or,
dismiss this message.
Paso
10/17
10/17
Ahora estás listo para dibujar tus diseños únicos en las ramas de
tu copo de nieve.
tu copo de nieve.
Please wait…
This video is having trouble loading. You may have lost your Internet connection.
Step 1: Click to Reload this page
Step 2: Click to
Try our other video player
Step 3: contact support if trouble persists.
Or,
dismiss this message.
Paso
11/17
11/17
Escoge qué forma quieres dibujar en la orilla de abajo.
Please wait…
This video is having trouble loading. You may have lost your Internet connection.
Step 1: Click to Reload this page
Step 2: Click to
Try our other video player
Step 3: contact support if trouble persists.
Or,
dismiss this message.
Paso
12/17
12/17
Corta a lo largo de esta línea primero.
Please wait…
This video is having trouble loading. You may have lost your Internet connection.
Step 1: Click to Reload this page
Step 2: Click to
Try our other video player
Step 3: contact support if trouble persists.
Or,
dismiss this message.
Paso
13/17
13/17
Recorta las formas que están cerca de las orillas, y amontona todos
los pedazos de papel que te sobren.
los pedazos de papel que te sobren.
Please wait…
This video is having trouble loading. You may have lost your Internet connection.
Step 1: Click to Reload this page
Step 2: Click to
Try our other video player
Step 3: contact support if trouble persists.
Or,
dismiss this message.
Paso
14/17
14/17
Conversemos:
Please wait…
This video is having trouble loading. You may have lost your Internet connection.
Step 1: Click to Reload this page
Step 2: Click to
Try our other video player
Step 3: contact support if trouble persists.
Or,
dismiss this message.
Paso
15a/17
15a/17
Conversemos:
Please wait…
This video is having trouble loading. You may have lost your Internet connection.
Step 1: Click to Reload this page
Step 2: Click to
Try our other video player
Step 3: contact support if trouble persists.
Or,
dismiss this message.
Paso
15b/17
15b/17
Esto fue lo que nosotros notamos.
Please wait…
This video is having trouble loading. You may have lost your Internet connection.
Step 1: Click to Reload this page
Step 2: Click to
Try our other video player
Step 3: contact support if trouble persists.
Or,
dismiss this message.
Paso
16a/17
16a/17
Conversemos:
Please wait…
This video is having trouble loading. You may have lost your Internet connection.
Step 1: Click to Reload this page
Step 2: Click to
Try our other video player
Step 3: contact support if trouble persists.
Or,
dismiss this message.
Paso
16b/17
16b/17
Esto es lo que nosotros pensamos.
Please wait…
This video is having trouble loading. You may have lost your Internet connection.
Step 1: Click to Reload this page
Step 2: Click to
Try our other video player
Step 3: contact support if trouble persists.
Or,
dismiss this message.
Paso
17/17
17/17
Si tienes tiempo, puedes crear otros modelos de copos de nieve.
🎉
That’s it for this lesson! How did it go?
Sign up now for more great lessons!