In this unit, students explore how the external characteristics of animals are essential for their survival. Students also make observations of parents and their offspring, determining how they are similar and how their behaviors help offspring survive.
In this lesson, students make observations of baby animals and their parents, gathering evidence that they look similar because they share many of the same traits. In the activity, Baby Bird Rescue, students help identify lost baby birds based on observations of their specific traits.
Cut along all dotted lines so that you have six individual birds per sheet. A paper cutter will make this task go quickly. Make sure to keep bird “A,” “B,” and “C” in separate piles.
Prepare Envelopes
Divide envelopes into three equal piles. Use a marker to label all envelopes in one pile “A.” Label all envelopes in another pile “B,” and label all envelopes in the third pile “C.”
Then, place one bird card in each labeled envelope, making sure to put bird “A” in envelopes labeled “A,” bird “B” in envelopes labeled “B,” and bird “C” in envelopes labeled “C.” Each pair of students working together will need three envelopes (“A,” “B,” and “C”) for the activity.
In this lesson, students carry out an investigation to determine the relationship between the shape of different bird beaks and the food each bird eats. In the activity, Find the Best Beak, students experiment with long pointy beaks that are great for picking up seeds and wide flat beaks that are good for scooping. They discover that different beaks are best for different kinds of food.
We suggest students work in groups of four. Homeschool students can work on their own.
This activity works best on a low pile carpet. If your classroom has a smooth floor (such as linoleum), you’ll need a bath towel to serve as the work area for each group of 4 students.
Make “Beaks”
Each student will need a “pointy beak” and a “duck beak” to experiment with.
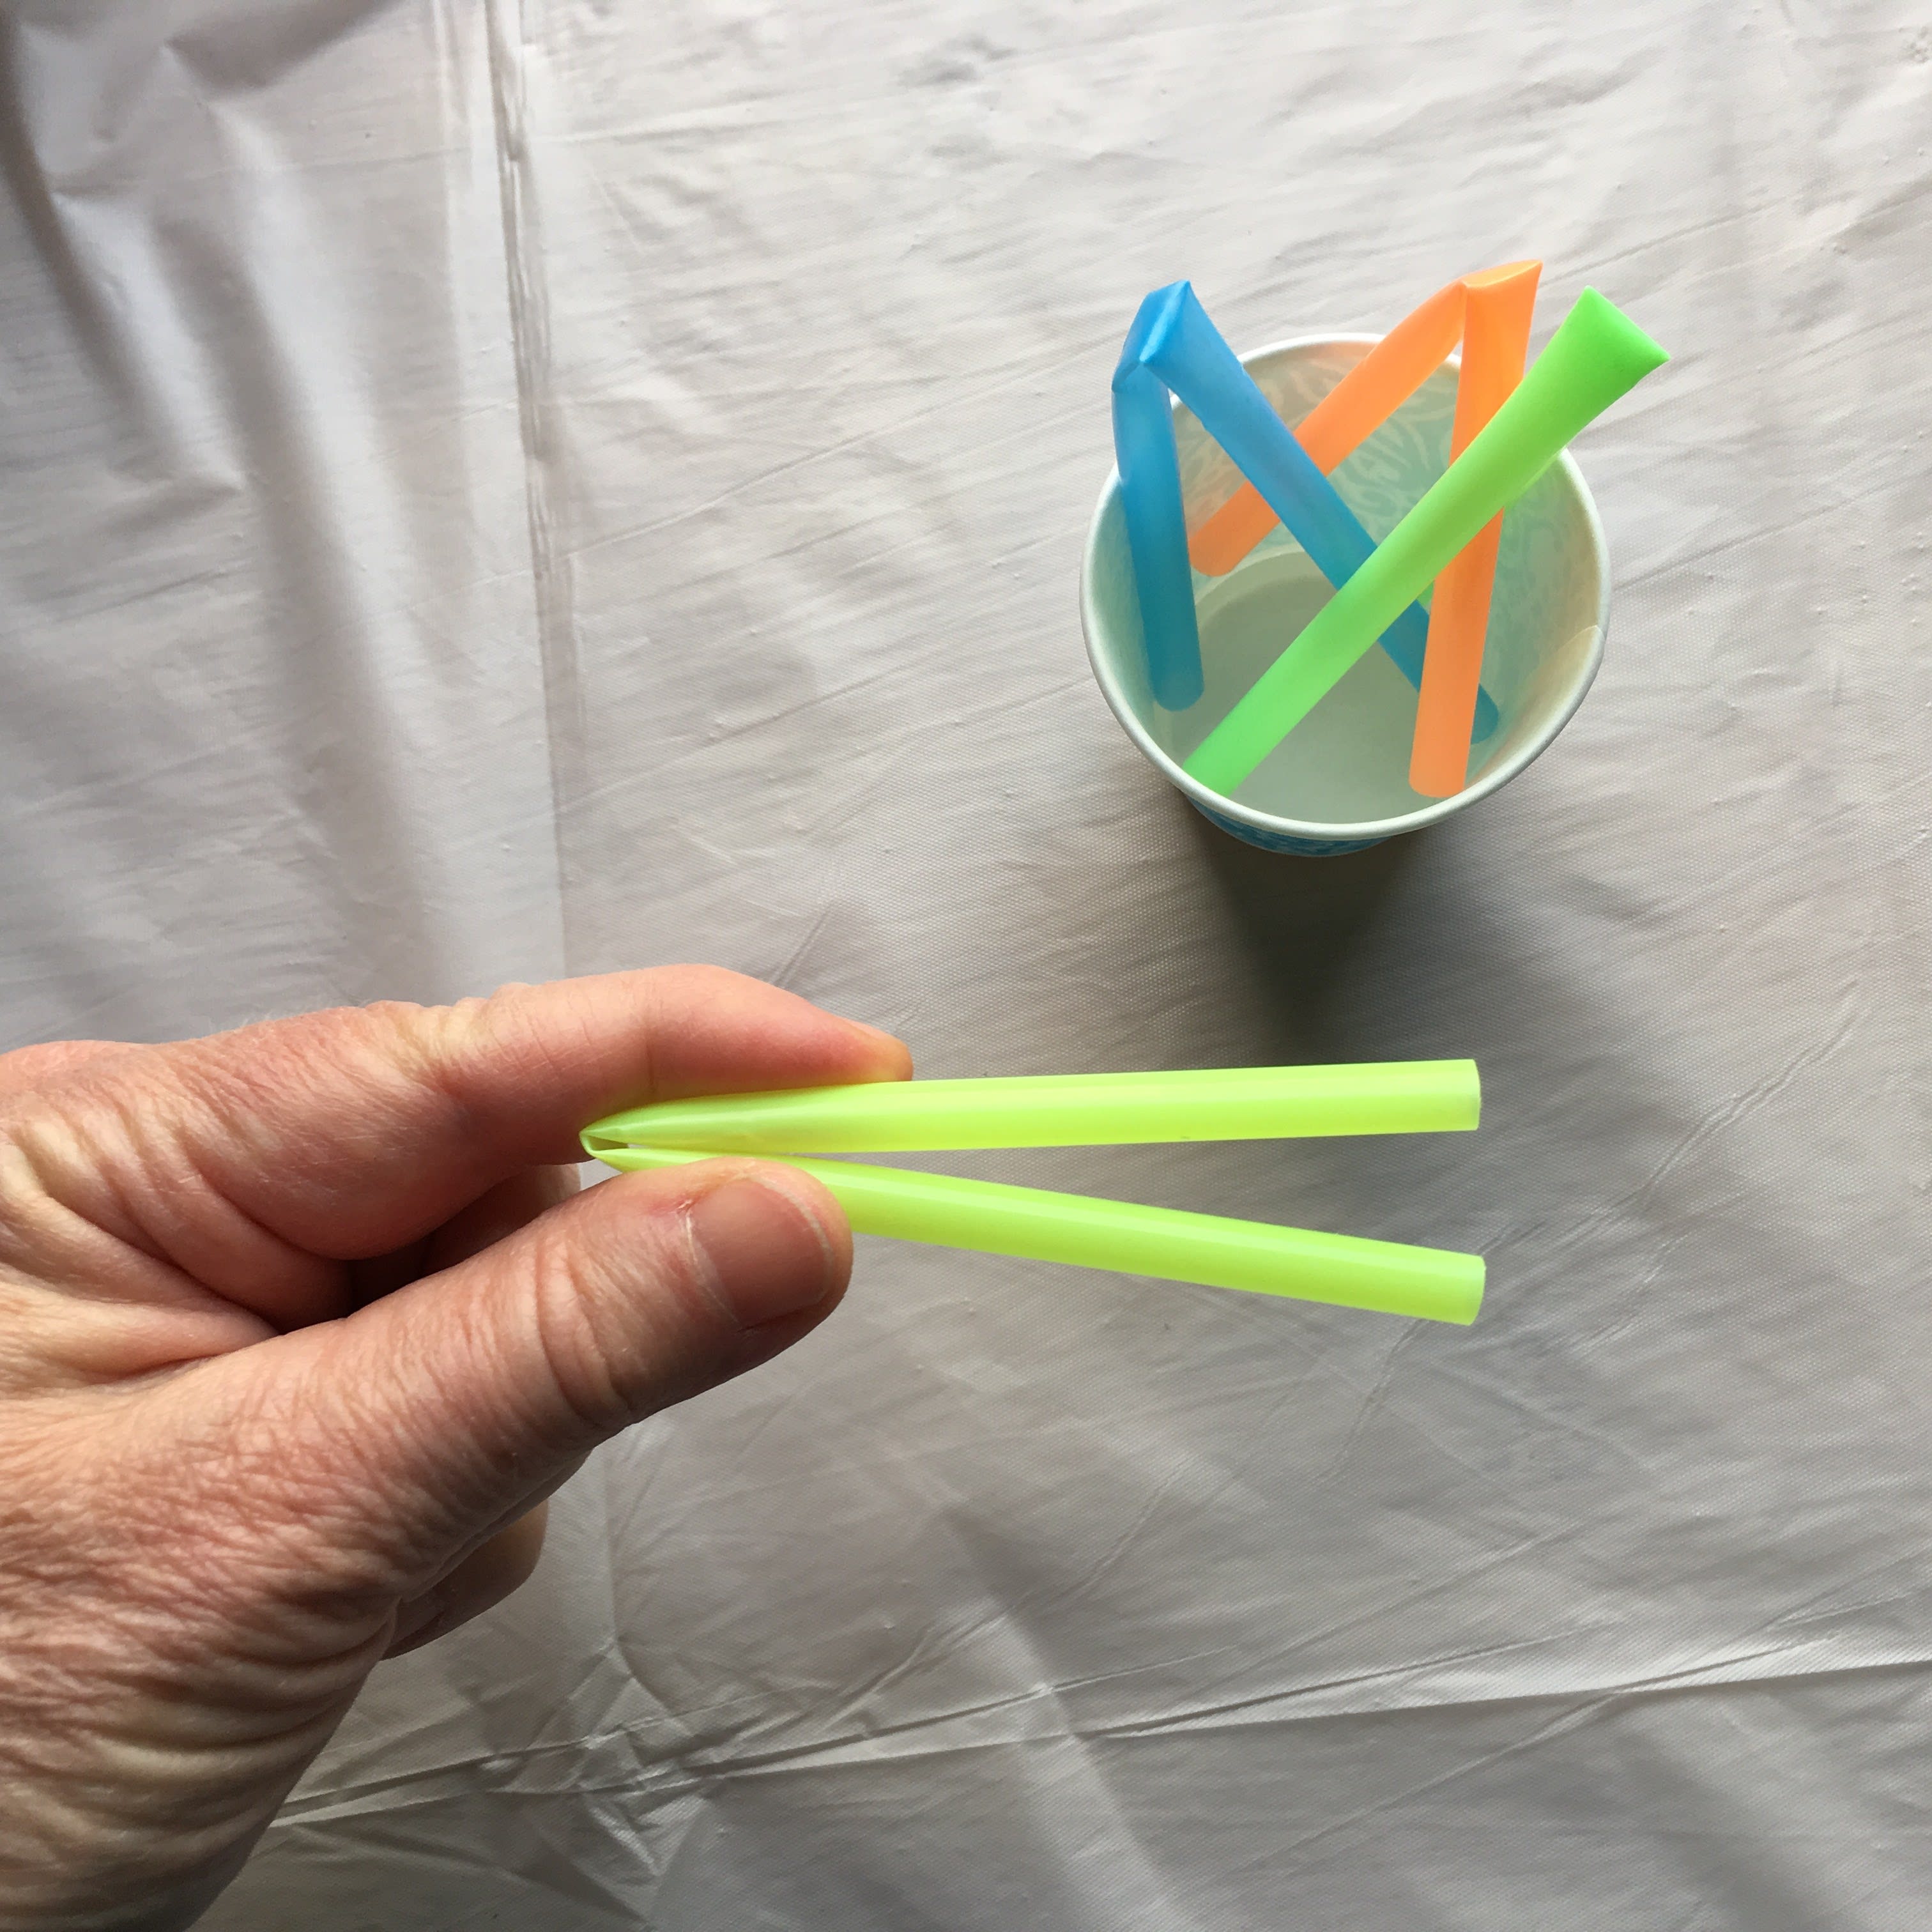
Here’s how to make a “pointy beak”:
Fold a straw in half.
Make sure that the ends of the straws are even. (If they aren’t, trim them with scissors.)
Store your “beaks” in a cup so they stay folded.
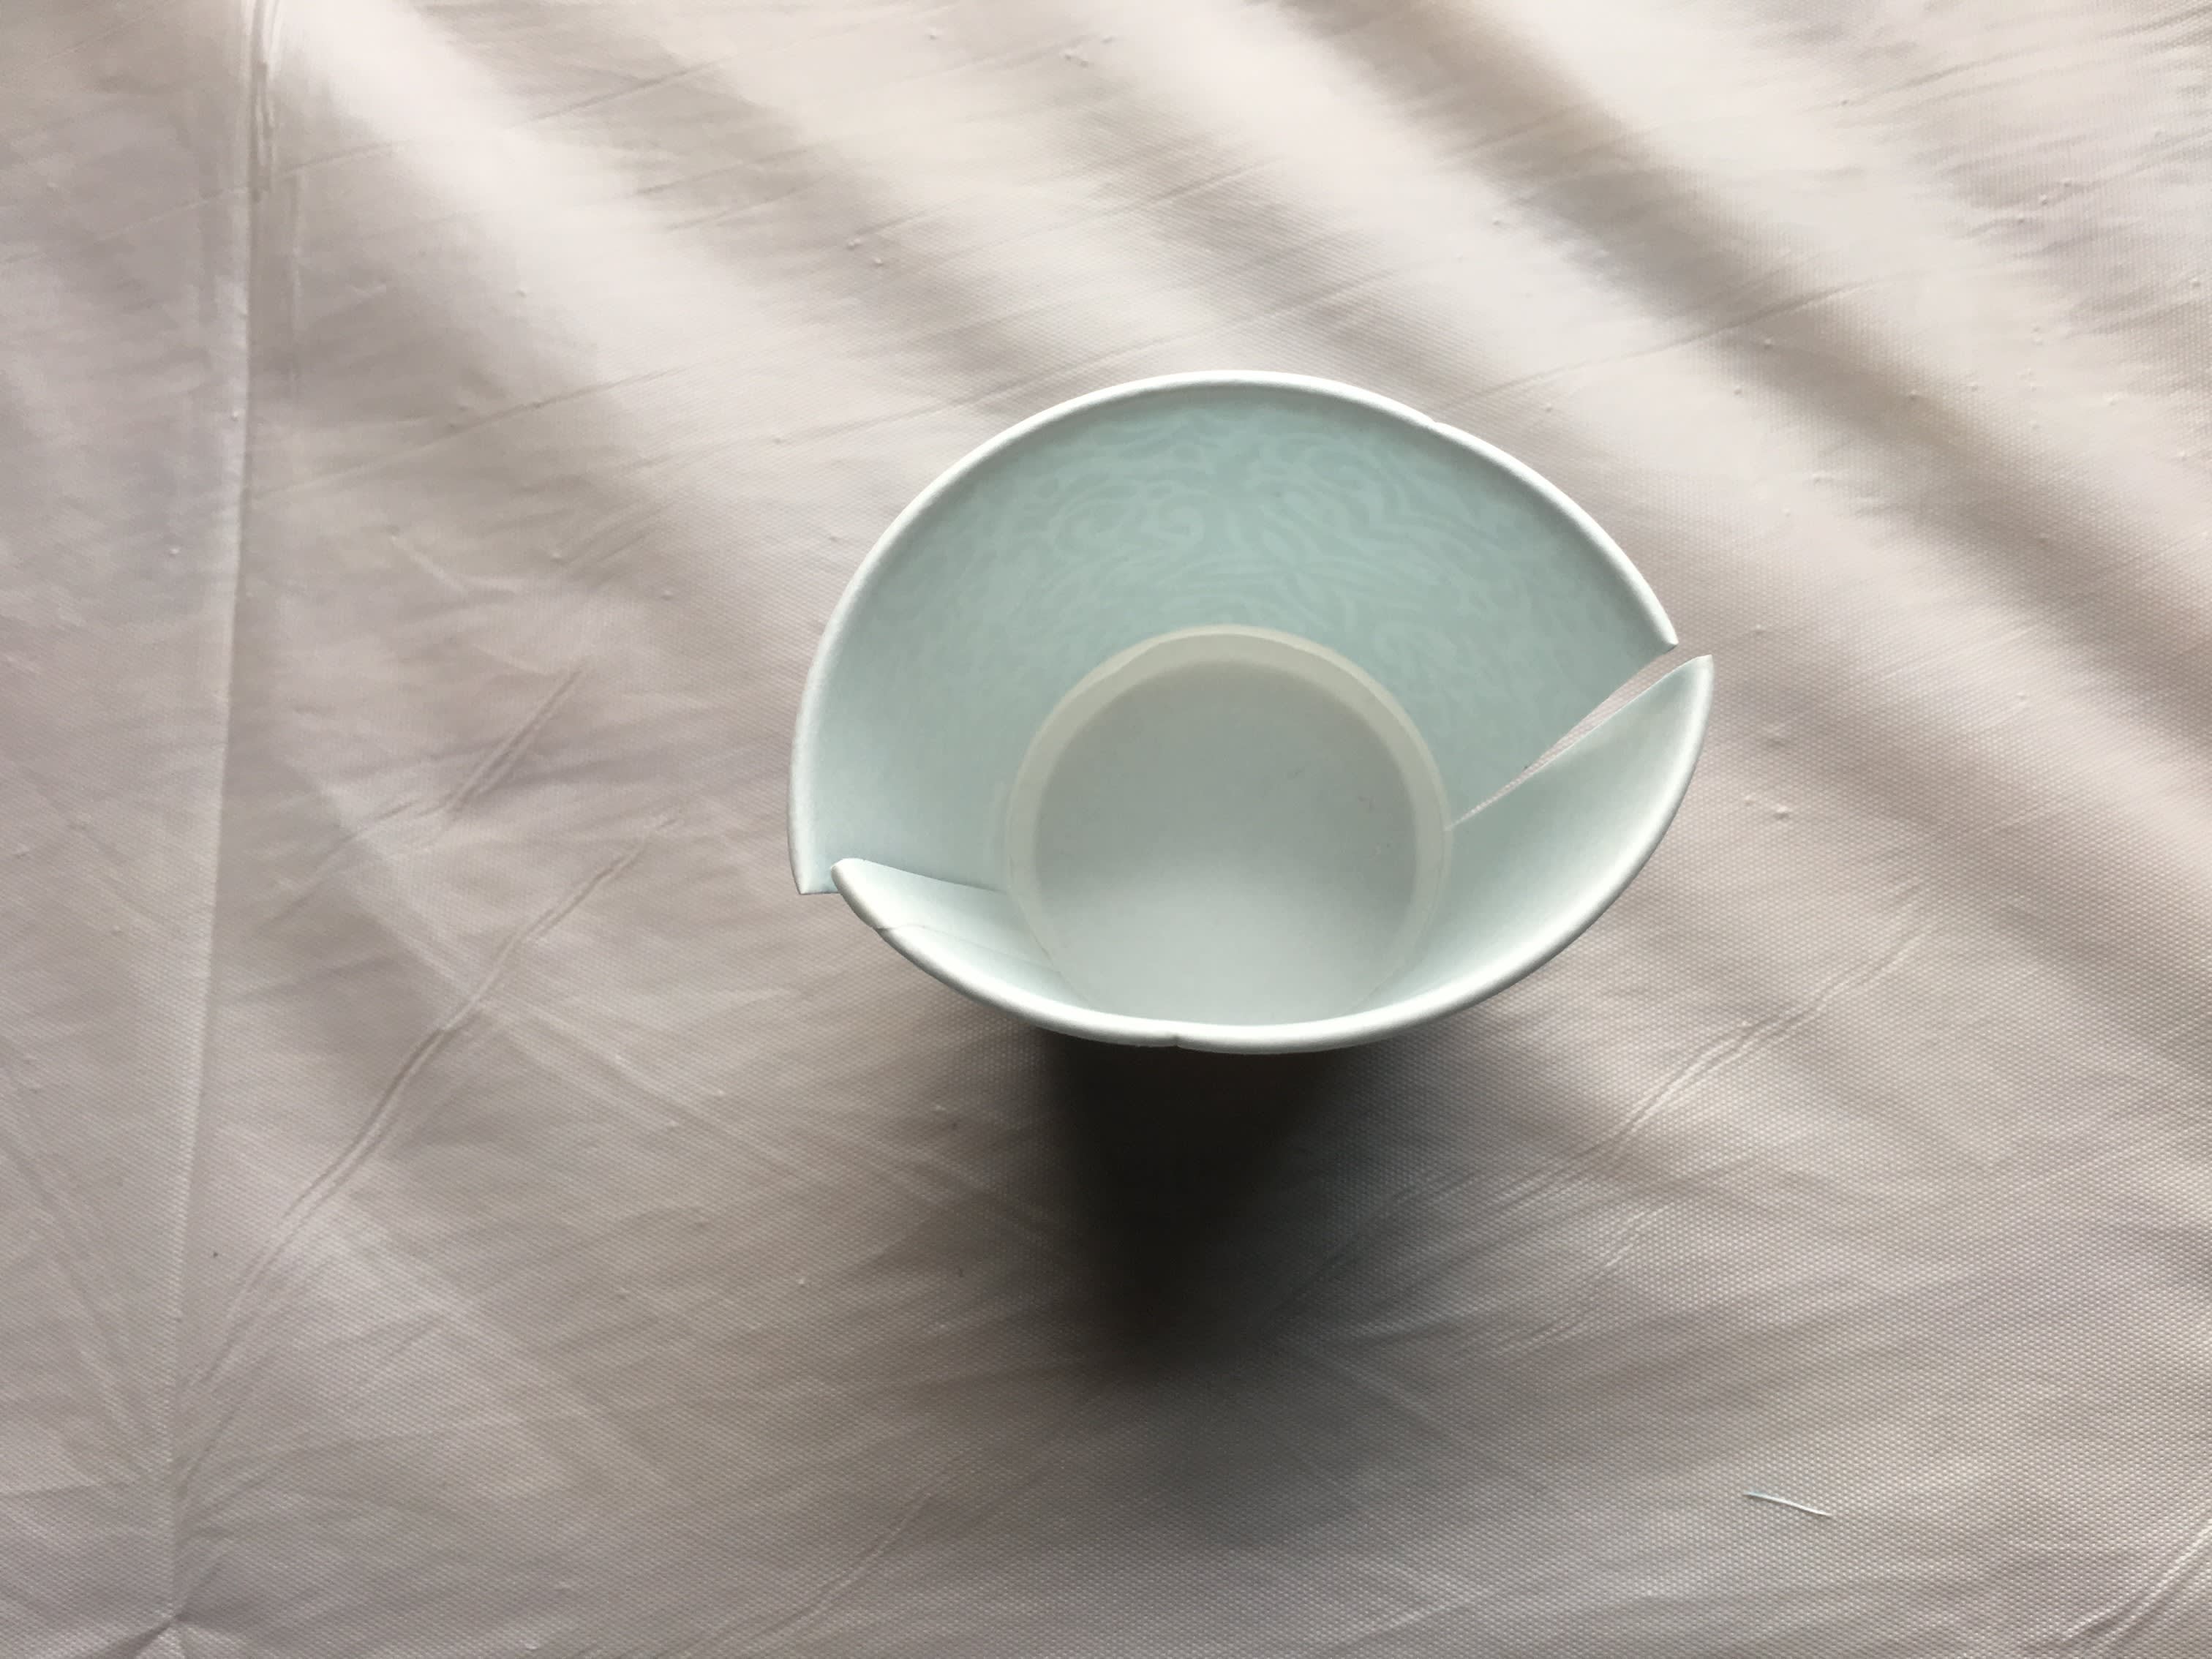
Here’s how to make a “duck beak”:
You will use half of your Dixie cups to make “duck beaks.” Leave the other half of your Dixie cups whole as they will serve as “stomach cups” for students.
For half the Dixie cups, use scissors to make a cut from the lip to the base of the cup.
Make a matching cut on the other side of the cup.
Squeeze the sides together to make a beak. (Quacking is optional.)
Set Up Stations
Mark off a test area for each group of four students.
If you have a low-pile carpet, mark a 3’ x 3’ square with masking tape.
If you have hard floors, spread out a bath towel and tape down the corners.
Prepare “Bird Food” and “Rocks”
For each group, you’ll need to prepare two cups. One filled with model “bird food” and the other filled with model “rocks.”
Divide the 8 oz paper cups in half.
For half of the cups, fill each about one-third full with dried macaroni “bird food.”
For the other half of the cups, fill each about one-third full with dried beans “rocks.”
Separate Supplies for Easy Distribution
At the start of the activity, each student needs a worksheet, “pointy beak,” “duck beak,” and “stomach cup.” Each group also needs a cup of “bird food.”
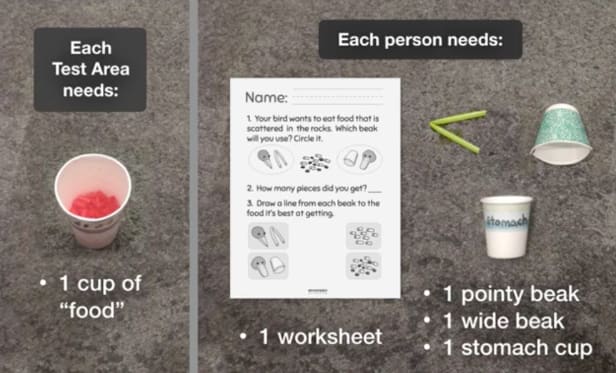
Each group will need a cup of “rocks” later in the activity. You may want to organize or separate supplies for easier classroom distribution.
In this Read-Along lesson, Juan Carlos visits his grandmother who has a backyard full of ducks. The lesson includes a short exercise where students get moving by acting like ducks. If you want to extend the lesson, you can try this optional activity, What’s Going On?, where students watch videos and discover ways that animal parents help their offspring.
In this lesson, students make observations to construct an explanation of why camouflage is helpful to animals. In the activity, Moth Hide and Seek, students test their ability to spot camouflage moths, and then design a camouflage pattern for a moth of their own and hide it in the classroom!
Each tree takes a wall space measuring about 32" wide by 55" tall (about the size of a door). You can build your trees on an empty wall, a bulletin board, or on a door. The activity works best if you have three different bark patterns, but if you don’t have enough space (or time) to make three trees, you can make one tree and two stumps.
To make your trees and/or stumps, follow these steps:
Cut out the pieces of each tree and stump by cutting on the dashed lines of the printouts. Then cut out the moths, following the instructions on the "Moths for Teachers" printouts.
Arrange the pieces on your wall to make trees and stumps, using glue dots or push pins to hold the paper in place. Watch this video to see how we did it.
Hide the Moths
You are going to hide paper moths for your students to find, and then your students will hide moths for you to find. Put a glue dot on the back of each moth and place it on a tree or stump — hide all nine moths. Put most of them on the bark that match, but put a few on the bark that don’t match, so that they are easy for your students to find.
Read-Along Lesson 5: Inheritance & Variation of Traits
In this Read-Along lesson, Amy notices that baby animals look a lot like the adults in their families—and then discovers that she does, too! The lesson includes a short exercise where students get moving by acting like farm animals. You can extend the lesson with the optional activity, Matchup Game, where students work together to match pictures of animals with their babies.
Print enough picture cards so that each student can have a parent animal or a baby animal. We suggest printing one copy of the parent animal cards and enough baby animals for the rest of the class since many babies can group with the same parent. If you have 30 students, you’ll need all 6 parent animal pictures and 24 assorted baby animal pictures. For homeschool or small classes, print out one of copy of each page, cut out the cards, and have students match mothers and babies. Cut out the pictures and put each one in its own envelope to distribute to your students.
In this mini-lesson, students discover how butterflies’ colors can help them blend into their habitat or scare away predators. In the activity, Paper Butterflies, students design their own paper butterflies by choosing colors that will help the butterflies survive, then create a butterfly card for someone special.
In this activity, each student makes and colors a paper butterfly and the flowers that this butterfly visits. By doing this, they’ll make a beautiful card that they can give to any special person in their life. You may want to use this as a Mother’s Day activity, but students write their own messages, so these cards can be for anyone special.
In this mini-lesson, students explore the huge variety of spiders that exist. Whether one finds spiders creepy or not, it's argued that they can be fascinating. In the activity, Spider Climber, students work together to build a spider out of paper that can climb up a string!
We suggest students work in pairs. Homeschool students will need a partner to help. Students will need a little bit of space in the classroom to spread out for testing their Spider Climbers.
Prepare Yarn
Cut your yarn so that each student will have a piece that is about 6 feet (2 meters) long.
Separate Supplies for Distribution
You may want to separate your supplies for easier classroom distribution. In addition to their Spider Climber template, each student will need the following supplies:
Teacher Tips
If a Spider Climber doesn’t run up its string, make sure that the string is not taped to the inside of the template, and also make sure students are holding the ruler and not the string when they are in the “Fly” role. The climber will only work if the string is able to move freely.
Spider Climbers (Grades K-2)
For the younger grades, we have provided three Spider Climber templates, each picturing a different spider (Jumping Spider, Crab Spider, and Orb Spider). In a class, we suggest giving students a choice of which spider they’d like to color. If students finish early, you can have them color in the other spider templates.
In this mini-lesson, students learn how some animals get the colors they have. In the activity, Animal Dances, students learn about animal displays by dancing along with ostriches, flamingos, and spiders.
No activity prep.
Lesson 11: Adaptations & Behavior
No materials required.
Lesson 12: Animal Traits & Food Sources
No materials required.
This episode is locked
Invite 5 or more friends and we'll unlock all previous episodes as a thank you!
Locked
6:10
Why is the sky blue?
Locked
4:41
Why do we call them doughnuts?
Locked
5:16
Could a turtle live outside its shell?
You are using an unsupported browser. For the best experience using Mystery Science,
we recommend upgrading to one of the following browsers: