About this Unit
Print AllIn this unit, students investigate the properties of matter by dissolving everyday chemicals to make solutions and by exploring simple yet surprising chemical reactions. Through these investigations, students begin to build conceptual models for the particulate nature of matter.
TEKS Standards
- 5.6A
- 5.6B
- 5.6C
- 5.6D
Unit Resources
Lesson 1: Properties of Matter
| Cup Organizer printout | Print 15 copies |
| Mystery Ingredient Observations worksheet | 30 copies |
| Mystery Ingredient Observations - Answer Key teacher-only resource | 1 copy |
| Vinegar Test printout | Print 15 copies |
| Water Test printout | Print 15 copies |
|
Clean-up Supplies (Eg. Paper Towels)
|
1 roll |
|
Baking Soda
|
5 tablespoons |
|
Corn Starch
|
5 tablespoons |
|
Craft Sticks
|
60 sticks |
|
Cups (Plastic, 3 oz)
You can use thick paper 3oz cups. Vinegar will dissolve and leak through regular 3oz cups.
|
30 cups
|
|
Dixie Cups (3 oz)
|
60 cups |
|
Measuring Spoons
|
1 set |
|
Plastic Straws (Not Bendable)
|
8 straws |
|
Salt
|
5 tablespoons |
|
Sheet Protector
|
30 |
|
Sugar
|
5 tablespoons |
|
Toothpicks
Preferably flat-edge, not pointed.
Coffee stirrers or craft sticks will also work.
|
15
|
|
White Vinegar
|
1 cup |
You will need access to water for this activity. We suggest students work in pairs. Homeschool students can work on their own.
Prepare Worksheets
Place each Water Test worksheet and each Vinegar Test worksheet into a sheet protector.
Prepare Cups with Powders
Each pair of students will need four cups with mystery ingredients. Divide your 3-oz paper cups into four equal piles. Use a sharpie to write 1, 2, 3, and 4 respectively on the cups in each pile. Add 1 teaspoon of salt to each cup labeled “1”. Add 1 teaspoon of sugar to each cup labeled “2”. Add 1 teaspoon of baking soda to each cup labeled “3”. Add 1 teaspoon of corn starch to each cup labeled “4”.
Prepare the Scoop Sticks
Divide your craft sticks into four equal piles. Use a pen to write 1, 2, 3, and 4 respectively on the sticks in each pile. Then, place each stick labeled "1" into a cup labeled "1". Repeat this for all ingredient cups.
Prepare Water and Vinegar
Divide your 3-oz plastic cups into two piles. Use a sharpie to write W (or Water) on half the cups and V (or Vinegar) on the other half of the cups. In each W cup, pour 1-2 tablespoons of water. In each V cup, pour 1 tablespoon of vinegar.
Prepare Straws
Cut each straw in half. Place one half straw into each of the W (water) cups.
Organize Supplies for Easy Distribution
Materials for this activity are needed at two different steps, so we suggest organizing them beforehand for easier distribution. In Step 2, students will need the following supplies.
In Step 11, each pair needs the Vinegar Test (in a sheet protector), some paper towels, and a cup of vinegar. We suggest students swap their cup of water for a cup of vinegar to avoid confusing the two clear liquids.
Lesson 2: Particle Models
| Cookie Particle Paths printout | Print 15 copies |
| Spinners printout | Print 15 copies |
|
Colored Pencils
|
15 |
|
Markers
A different color than the colored pencil.
|
15 markers
|
|
Scissors
|
15 pairs |
|
File Folder Labels (Stickers)
|
30 stickers |
|
Paper Clips
|
30 paper clips |
|
Paper Fasteners
|
30 fasteners |
We suggest students work in pairs. Homeschool students can work on their own.
Organize Supplies for Easy Distribution
Students will need supplies at two different steps during the activity. We recommend organizing supplies for easier distribution. In Step 2, each pair of students will need the following:
Spinner Troubleshooting
If a spinner is not working, check the following:
There is space between the paper clip, the fastener, and the paper.
The fastener’s prongs go through the larger loop of the paper clip, not the smaller one.
No paper scraps from the hole puncture are stuck in the fastener or paper clip.
Lesson 3: Properties of Matter: Acids
| Identify the Acids worksheet | 30 copies |
| Identify the Acids - Answer Key teacher-only resource | 1 copy |
|
Clean-up Supplies (Eg. Paper Towels)
|
1 roll |
|
Baking Soda
|
1 cup |
|
Coffee Stirrers
|
40 stirrers |
|
Craft Sticks
|
15 sticks |
|
Cups (Plastic, 3 oz)
You can use 3oz paper cups, but vinegar will start to leak through some brands.
|
30 cups
|
|
Dixie Cups (3 oz)
|
60 cups |
|
Secret Substance 1
You can use any household substance such as lemonade, orange juice, ketchup, or mustard.
|
1 cup
|
|
Secret Substance 2
You can use any household substance such as lemonade, orange juice, ketchup, or mustard.
|
1 cup
|
|
Secret Substance 3
You can use any household substance such as lemonade, orange juice, ketchup, or mustard.
|
1 cup
|
|
White Vinegar
|
1 cup |
You will need access to water for this activity.
We suggest students work in pairs. Homeschool students can work on their own.
Prepare Mixing Sticks
Break each coffee stirrer in half. Each pair of students will need 5 halves as mixing sticks.
Prepare Cups with Liquids
Gather your plastic 3-oz cups and separate them into two equal piles. Label all cups in one pile "W" and add about 1 tablespoon of water into each cup. Label all cups in the other pile "V" and add about 1 tablespoon of white vinegar into each cup.
Prepare Paper Cups
Gather your paper 3-oz cups and separate them into four equal piles. Label all cups in one pile "B" and add about 1 tablespoon of baking soda into each cup. Label the remaining piles of cups "1", "2", and "3". Then, add 1 tablespoon of each household substance that you'll be testing. We suggest using acidic foods like mustard, ketchup, lemon juice, orange juice, or yogurt. You can also use milk or egg white as less acidic (or basic) substance.
Separate Supplies for Easy Distribution
Students will need supplies at two separate steps of the activity. In Step 2, they will need the following supplies.
Then, in Step 9, they will need the unknown substances and three clean mixing sticks.
Lesson 4: Chemical Reactions & Fair Tests
| Explosion Investigation worksheet | 30 copies |
| Explosion Investigation - Answer Key teacher-only resource | 1 copy |
|
Clean-up Supplies (Eg. Paper Towels)
|
1 roll |
|
Scissors
|
30 pairs |
|
Baking Soda
|
1 cup |
|
Corn Starch
|
1 cup |
|
Craft Sticks
|
15 sticks |
|
Dixie Cups (3 oz)
|
30 cups |
|
Plastic Cups (9 oz, Solo)
Vinegar can leak through paper cups.
|
45 cups
|
|
Plastic Plates (10")
|
30 plates |
|
Plastic Spoons
|
45 spoons |
|
White Vinegar
|
8 cups |
|
Ziploc Bags (Snack Size)
We do not suggest using sandwich size bags because they need more vinegar and baking soda to inflate, and the resulting explosion is likely to overflow the plastic plate.
|
30 bags
|
OPTIONAL SUPPLIES |
|
|---|---|
|
Safety Glasses
|
30 pairs |
We strongly recommend that students wear eye protection for this activity.
We suggest students work in pairs. Homeschool students can work on their own, but will need to do both setups for the experiment in order to run a fair test.
Prepare Cups
Divide your plastic cups into three equal piles. Use a sharpie to label each cup in one pile "A", label those in the second pile "B", and those in the third pile "L" for liquid. Add a tablespoon of corn starch to each "A" cup, add a tablespoon of baking soda to each "B" cup. Pour a half cup of vinegar into each of the "L" cups. Then, place one spoon into each cup.
Separate Supplies for Easy Distribution
We suggest organizing supplies as shown below for easier distribution.
Noise Accommodations
The plastic baggies are intended to inflate and pop. Some accommodations you can make to decrease noise levels include (1) reducing the amount of liquid and powder in the bags so that they inflate but do not pop, or (2) modifying the activity as a teacher-led demonstration.
Lesson 5: Chemical Reactions
| Goo Testing printout | Print 15 copies |
| Goo Testing Answer Key teacher-only resource | 1 copy |
|
Clean-up Supplies (Eg. Paper Towels)
|
1 roll |
|
Mixing Bowl
|
2 bowls |
|
Table Covering (eg. Trash Bags)
|
16 bags |
|
1 Cup (8 oz) Container
|
1 container |
|
Baking Soda
|
1 teaspoon |
|
Dixie Cups (3 oz)
For Part 1 of the activity.
|
48 cups
|
|
Dixie Cups (3 oz)
For Part 2 of the activity.
|
60 cups
|
|
Measuring Cup
|
1 cup |
|
Measuring Spoons
|
1 set |
|
Milk
|
8 tablespoons |
|
Multi-Purpose Glue
We suggest multipurpose glue. For reference, 2 tbsp = 1 oz.
|
3 cups
|
|
Paper Plates
|
30 plates |
|
Plastic Straws (Not Bendable)
|
32 straws |
|
Sheet Protector
You can also use taped-down waxed paper or Press n' Seal.
|
15
|
|
Toothpicks
|
150 toothpicks |
|
White Vinegar
|
8 tablespoons |
|
Ziploc Bags (Sandwich Size)
|
30 bags |
|
Borax
|
8 teaspoons |
You will need access to water for this activity.
We suggest students work in pairs and two pairs of students share supplies at a group table. Homeschool students can work on their own.
Plan Your Time
You may want to divide this activity into two sessions.
- Part 1 (testing substances) takes 15 to 20 minutes.
- Part 2 (creating goo) takes another 15 minutes. Begins at Step 12.
To make the baking soda solution, use your 1-cup container to mix 1 cup water and 1 teaspoon baking soda.
To make the glue mixture, mix equal amounts of glue and water in a mixing bowl. This glue mixture will be enough for both parts of the activity.
To make the borax solution (for up to 32 students), in the other mixing bowl, mix 8 teaspoons borax powder with 4 cups warm water. It is okay if all of the borax powder doesn't dissolve. This borax mixture will be enough for both parts of the activity.
If you are splitting the lesson between two days, just keep the mixtures covered so they don’t dry out.
Prepare the Straws
Students use straws as pipettes for transferring liquid from a Dixie cup. Regular-length straws cause Dixie cups to tip over and spill. To prevent this from happening:
- cut each straw in half.
- lay the straws side by side with their ends squared up.
- eyeball ½ inch away from the cut edge and lay a ruler down at this point.
- draw a line across the straws using a permanent marker, as shown below.

Prepare the Testing Supply Cups for Part 1
- Count out 6 cups for each group of 4 students (or homeschool student).
- Use a permanent marker to mark cups for each group.
- W for Water
- S for Baking Soda solution
- B for Borax solution
- G for Glue/water mixture
- V for Vinegar (If you use paper cups, be aware that vinegar will leak through some brands after an hour and a half. Plan accordingly.)
- M for Milk
- Put 1 tablespoon of the corresponding supply in each cup.
Prepare the Mystery Goo Cups for Part 2
Using the remaining Dixie cups, you’ll prepare a cup of glue mixture and a cup of Borax solution for each student. * Add 2 Tbsp of glue/water mixture in half of the Dixie cups. * Add 1 Tbsp of borax solution in each to the other half of the cups.
Note that for homeschool students, you can always make a larger batch of goo as long as you mix the glue/water mixture with the borax solution in a 2:1 ratio.
Separate Supplies for Easy Distribution
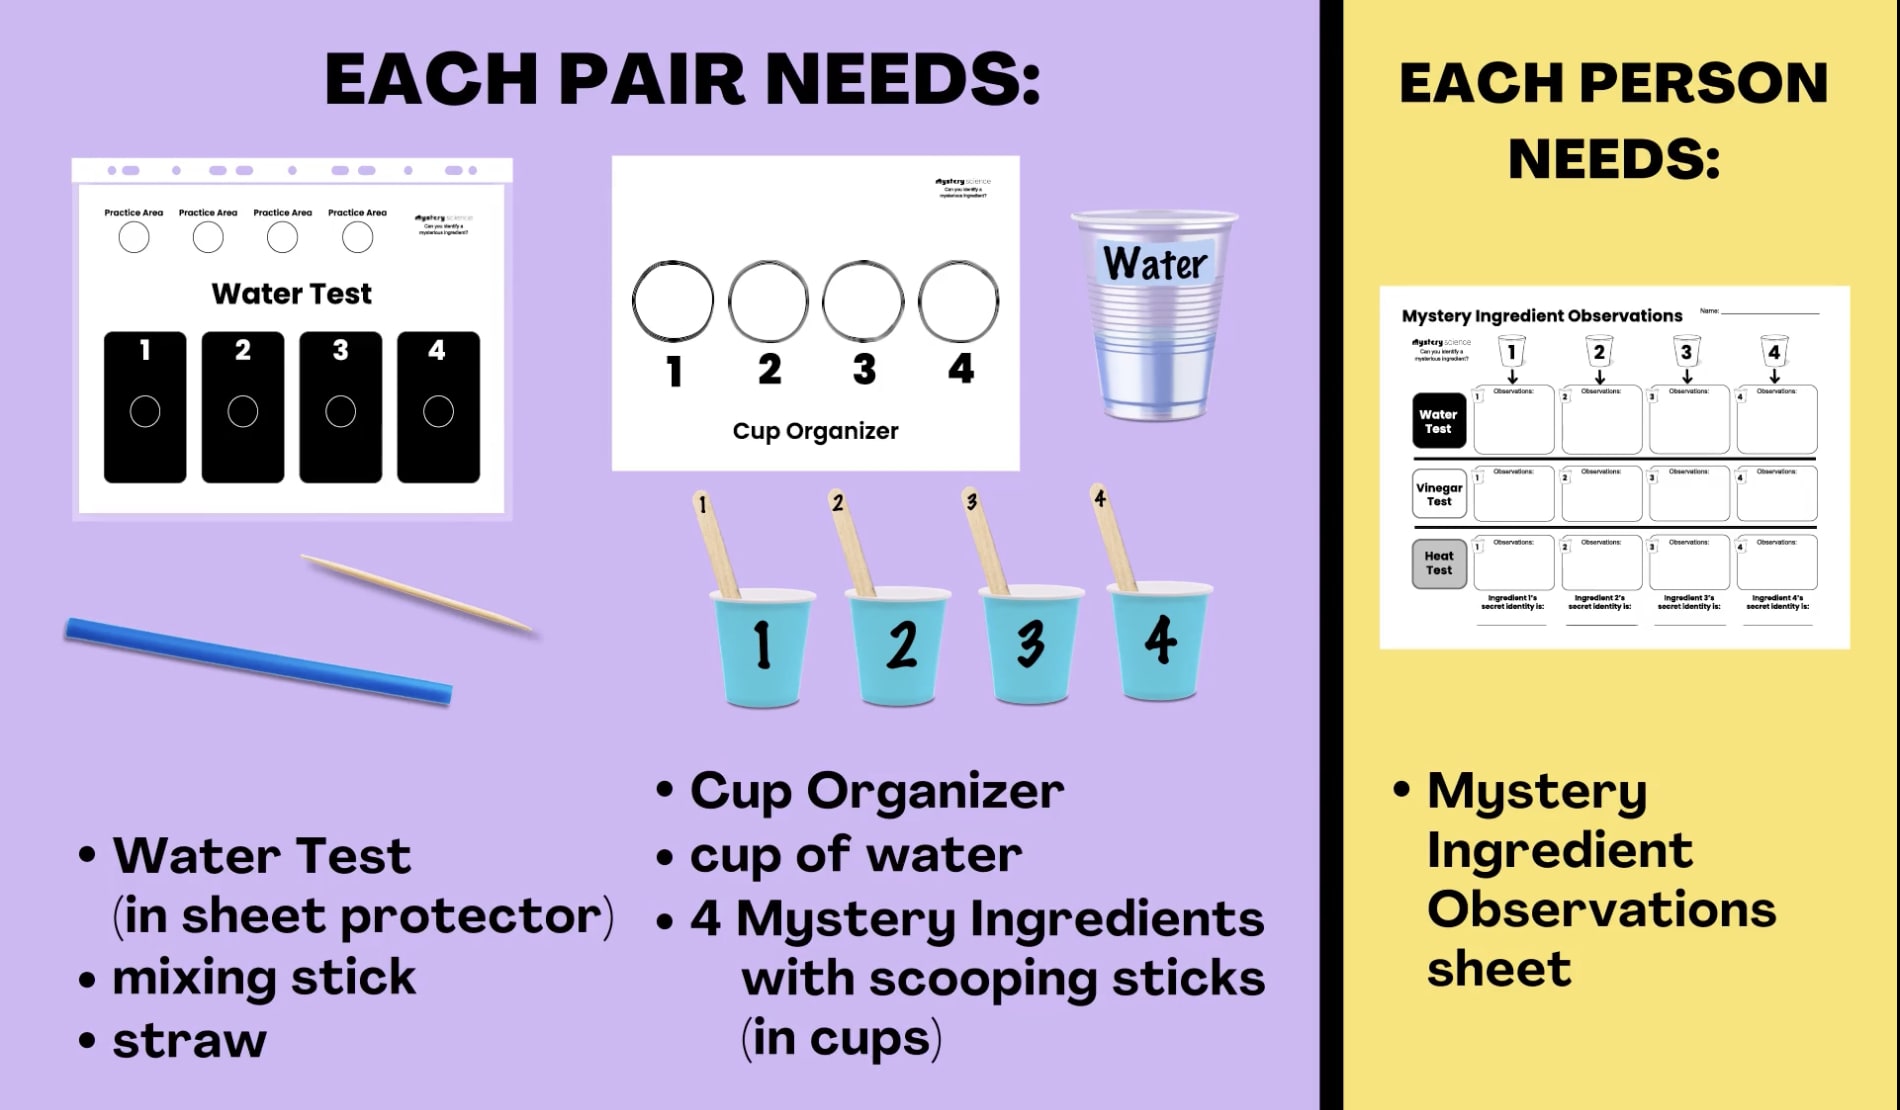
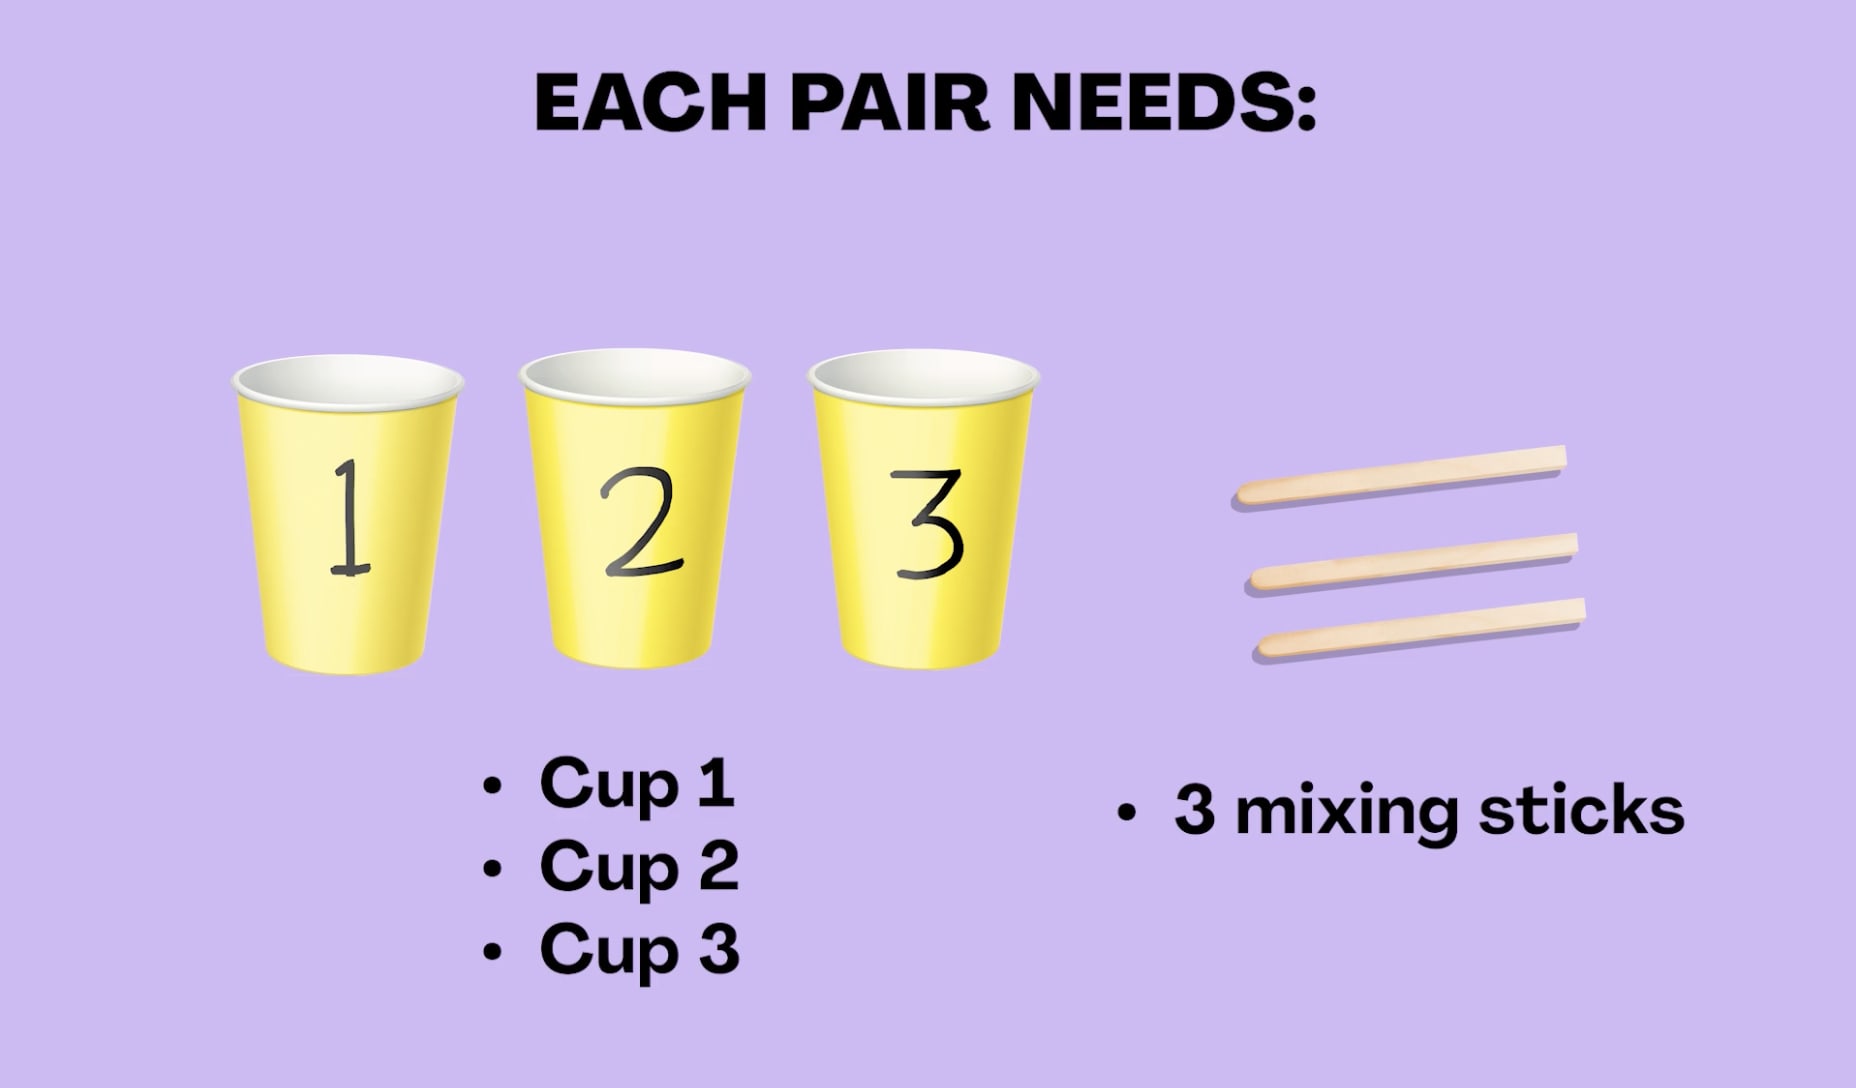
In Part 1, your students will first practice using a straw to put water onto their testing mat. They’ll need the following supplies for this:

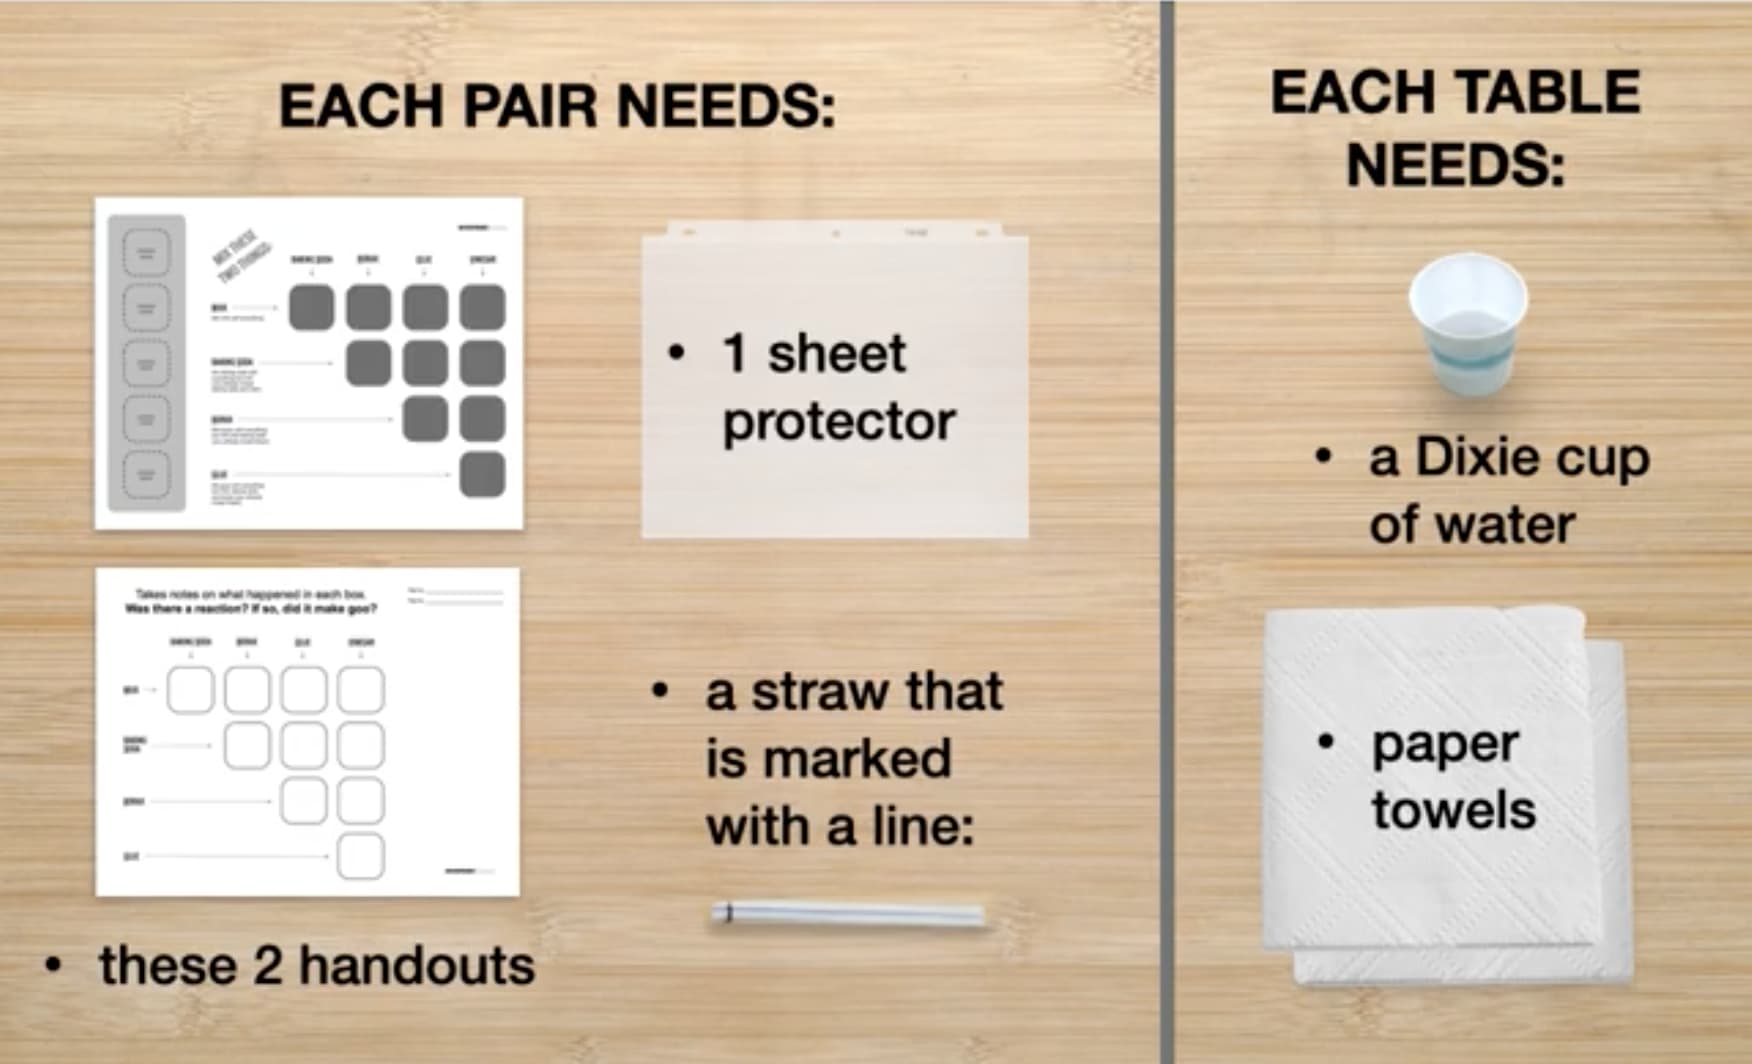
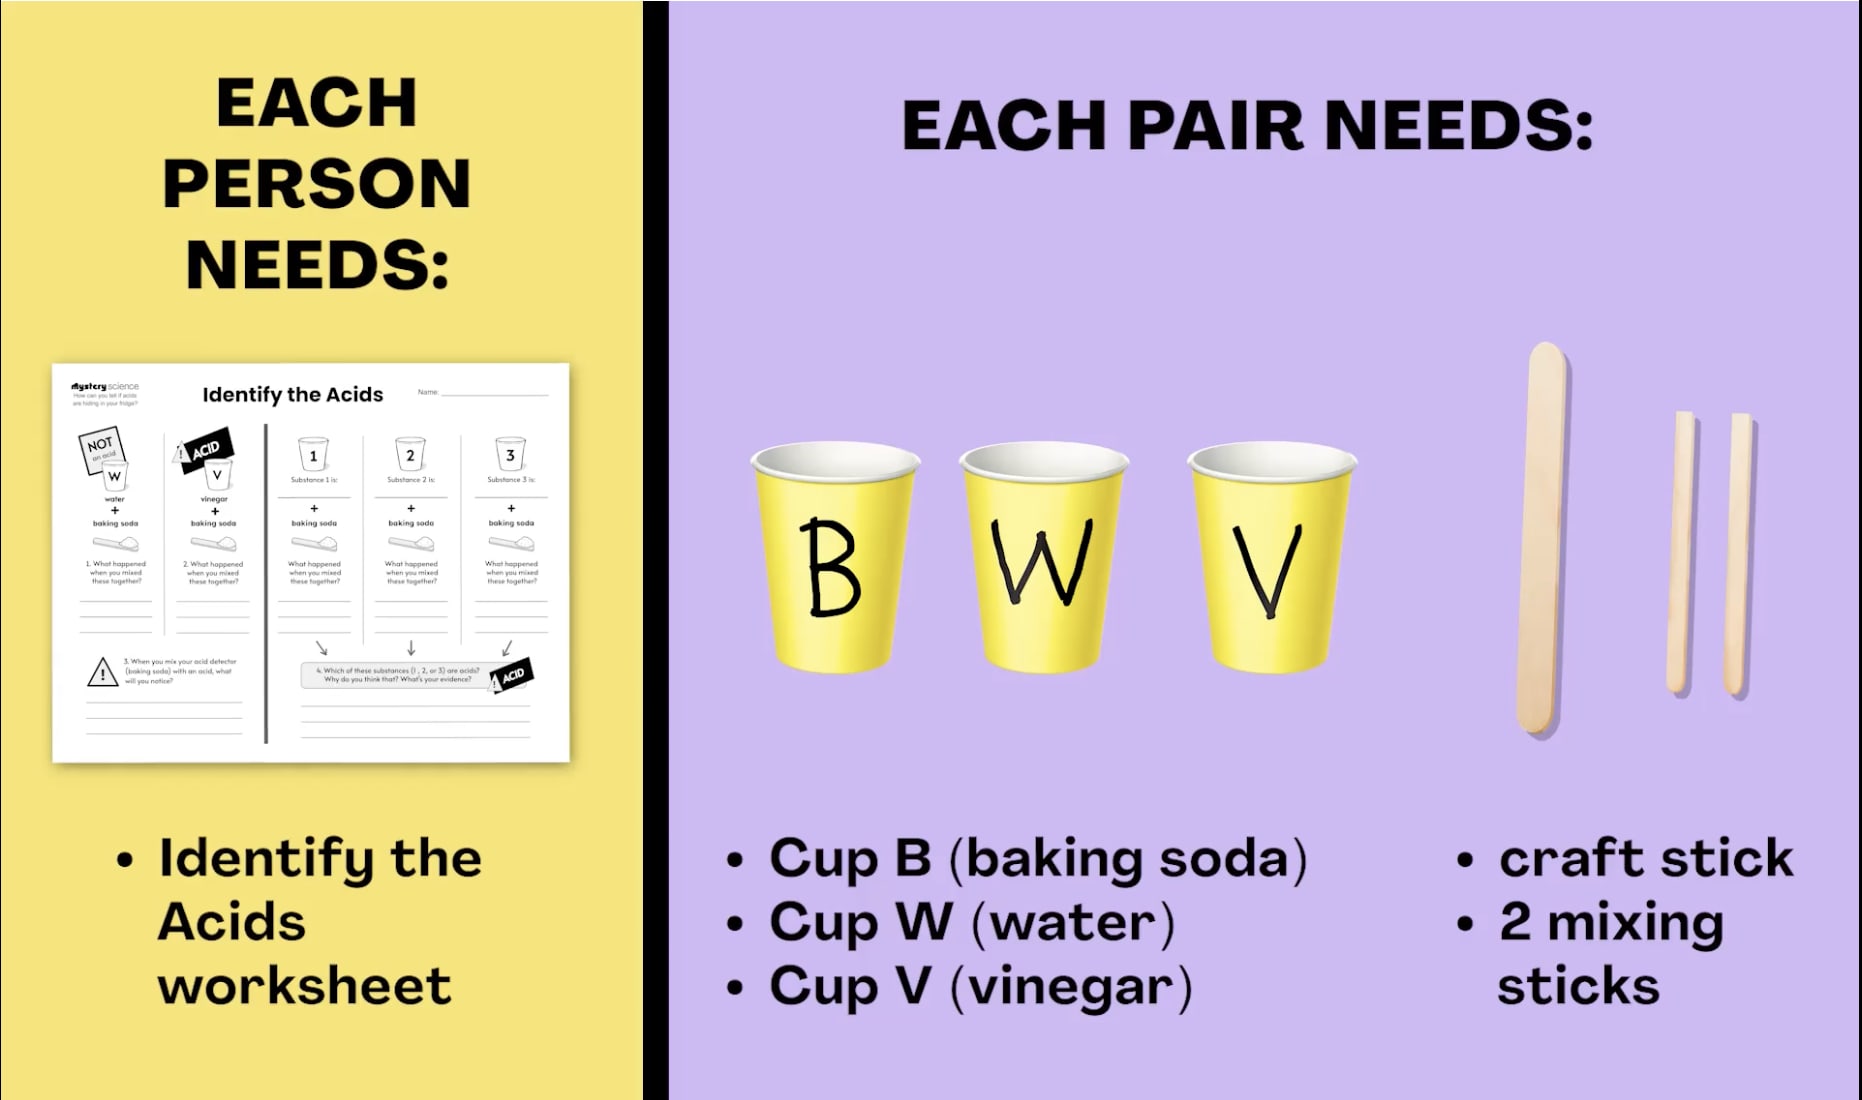
Then, students will combine and test different substances to see if they react. Students will share supplies with others at their table and will need the following:

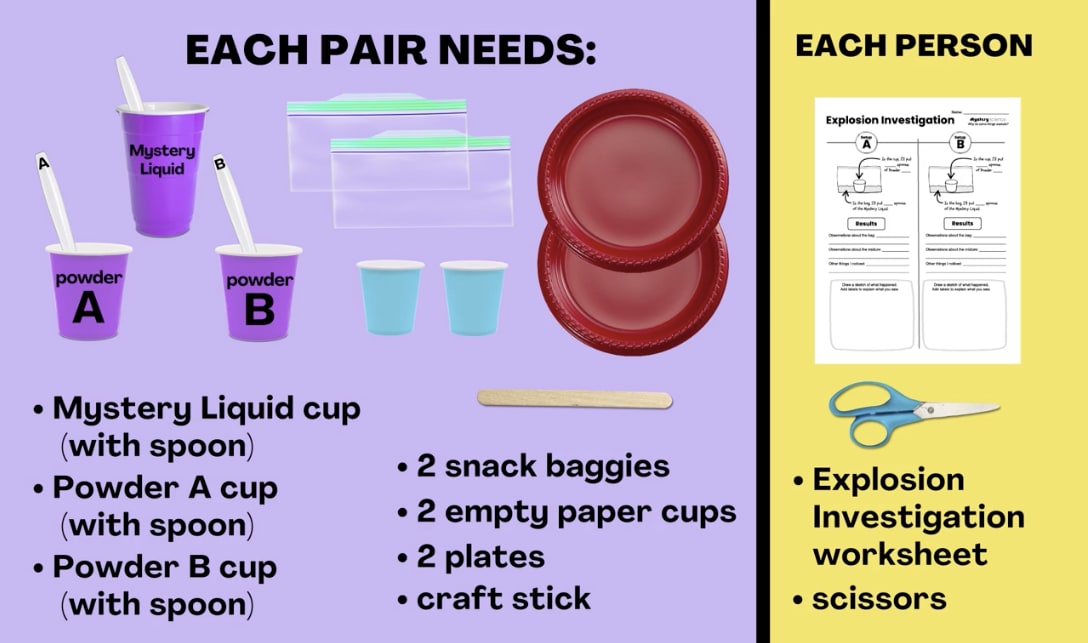
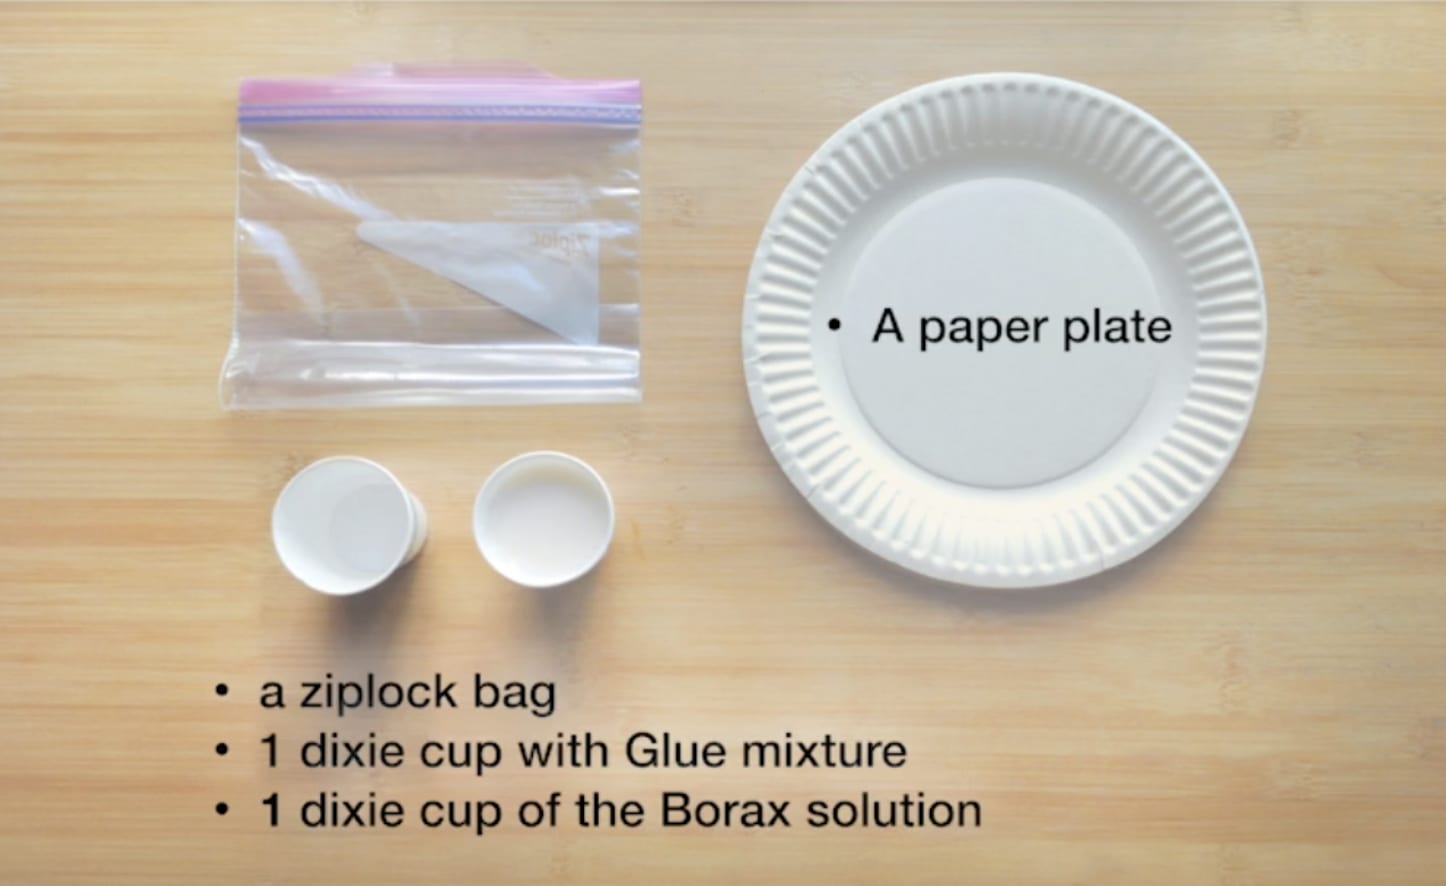
In Part 2 of the activity, students will each create their own small bag of goo to take home with them. They will each need the following supplies:

You may want to set up supply stations for easier classroom distribution.
Borax, while safe when diluted, can be a mild skin irritant to some people, especially those with sensitive skin. If you are concerned, you may want to consider having your students wear gloves or use one of our Alternative Goo Recipes here .